



LED color gel nail polish has revolutionized the nail care industry, offering a durable and vibrant alternative to traditional nail polish. Unlike regular polishes that can chip and fade quickly, LED color gel polish is cured under an LED lamp, ensuring a long-lasting, high-gloss finish that can withstand daily wear and tear.
This comprehensive guide explores the world of LED color gel nail polish, delving into its benefits, application techniques, and maintenance tips. Whether you’re a professional nail technician or a DIY enthusiast, understanding the nuances of LED color gel polish will help you achieve salon-quality results with ease.
What is LED Color Gel Nail Polish?

LED color gel nail polish is a type of nail polish that is formulated to be cured under an LED lamp. Unlike traditional nail polishes, which air-dry over time, LED gel polish hardens quickly when exposed to the specific light wavelengths emitted by an LED lamp. This curing process creates a durable, high-gloss finish that can last for weeks without chipping or fading.
Importance of LED Color Gel Nail Polish in Nail Care
The advent of LED color gel nail polish has brought significant advancements to the nail care industry. Its long-lasting nature and resistance to chipping have made it a popular choice among both professional nail technicians and at-home users. The quick curing time reduces the risk of smudging, allowing for a flawless finish that traditional polishes often struggle to achieve.
Additionally, the wide range of available colors and finishes provides ample creative possibilities, making LED gel polish an essential tool for anyone looking to maintain beautiful, resilient nails.
Types of LED Color Gel Nail Polish:
LED color gel nail polish comes in the following types:
1. Primary Color Gels:
Primary color gels are the basic building blocks in the world of LED gel nail polish. These include the essential colors: red, blue, and yellow. These primary colors can be used alone for bold, striking nails or mixed to create a broader palette of custom shades. Their vibrant and opaque finish makes them a favorite choice for solid, statement-making nail designs.
2. Secondary Color Gels:
Secondary color gels are created by combining two primary colors. These include green, orange, and purple. These gels offer a wide variety of hues and tones, allowing for more diverse and intricate nail art. The blend of primary colors to produce these secondary shades often results in a unique depth and richness that can enhance any manicure.
3. Special Effect Gels:
Special effect gels take nail design to the next level with their unique finishes and properties. These can include:
1. Glitter Gels: Infused with tiny particles of glitter, these gels add sparkle and shine to any manicure.
2. Holographic Gels: These create a multidimensional, rainbow-like effect that shifts color depending on the light and angle.
3. Metallic Gels: Offering a reflective, shiny finish, metallic gels provide a sleek, modern look.
4. Thermochromic Gels: These change color with temperature variations, creating dynamic and ever-changing nail art.
5. Cat Eye Gels: When used with a magnet, these gels create a line or pattern that resembles a cat’s eye.
These special effect gels enable endless creative possibilities, making them a must-have for nail enthusiasts and professionals seeking to add a unique touch to their designs.
Choosing the Right LED Color Gel Nail Polish

Selecting the perfect LED color gel nail polish involves considering several factors to ensure the best results for your manicure. Here’s a guide to help you choose the right gel polish:
1. Color Selection:
- Skin Tone: Choose colors that complement your skin tone. For example, warm tones work well with reds and oranges, while cool tones pair nicely with blues and purples.
- Occasion: Consider the event or occasion. Neutral tones are great for everyday wear, while bold colors or special effects might be better for events.
- Season: Seasonal colors can add a fashionable touch. Pastels are great for spring, while deeper shades are perfect for fall and winter.
2. Brand and Quality:
- Reputation: Opt for reputable brands known for their quality and longevity. Read reviews and seek recommendations.
- Ingredients: Look for gel polishes that are free from harmful chemicals like formaldehyde, toluene, and DBP (dibutyl phthalate).
3. Finish and Effect:
- Glossy or Matte: Decide whether you prefer a shiny, glossy finish or a chic, matte look.
- Special Effects: Choose from various special effects like glitter, holographic, metallic, or cat eye for a unique touch.
4. Curing Requirements:
Ensure the gel polish is compatible with your LED lamp. Some polishes may require specific wattage or curing times.
5. Durability and Wear:
Consider how long you want the polish to last. Higher-quality gels tend to be more durable and resistant to chipping.
6. Ease of Application and Removal:
Look for gels that have a smooth application process and are easy to remove to minimize nail damage.
7. Color Temperature and Gel Selection
Understanding color temperature can help you achieve the desired effect:
- Cool Tones: Shades like blues, greens, and purples have a calming effect and are suitable for creating a serene and sophisticated look.
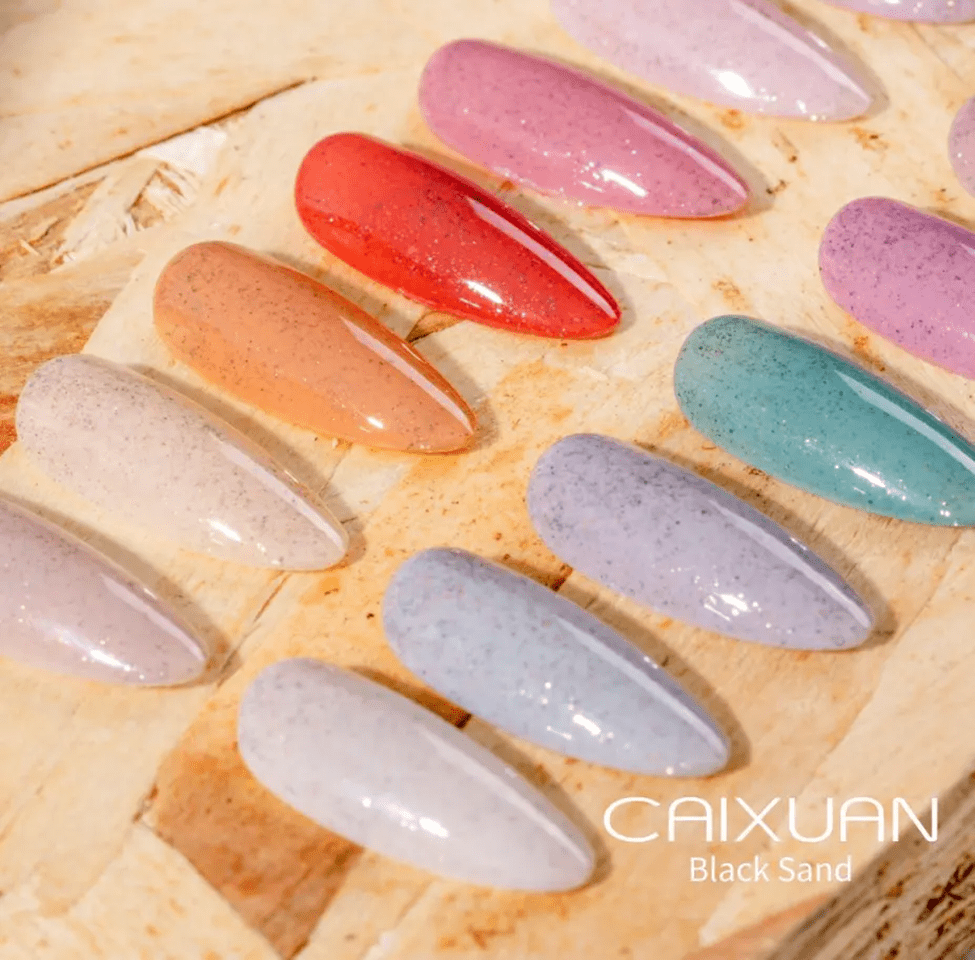
- Warm Tones: Reds, oranges, and yellows evoke warmth and energy, making them great for a vibrant and lively appearance.
- Neutral Tones: Beige, taupe, and soft pinks offer versatility and can complement any outfit or occasion.
8. Compatibility with Different LED Lamps
- Lamp Wattage: Ensure your LED lamp has the appropriate wattage to cure the gel polish effectively. Higher-wattage lamps typically cure faster.
- Curing Time: Follow the manufacturer’s instructions for curing times to achieve the best results and avoid under or over-curing the polish.
By considering these factors, you can select the right LED color gel nail polish that suits your preferences and needs, ensuring a beautiful and long-lasting manicure.
How to Use LED Color Gel Nail Polish?
Achieving a perfect manicure with LED color gel nail polish involves a few key steps. Here’s a detailed guide to help you use LED gel polish effectively:
Preparation
- Clean and Shape Nails:
Remove any old nail polish with a non-acetone remover. Trim and shape your nails to your desired length and shape using a nail clipper and file. Push back and trim your cuticles for a clean nail bed.
- Buff Nails:
Gently buff the surface of your nails to remove shine and create a rough surface for better gel adhesion.
- Clean Nails:
Clean your nails with a lint-free wipe soaked in nail cleanser or alcohol to remove any dust and oils.
Application
- Base Coat:
Apply a thin layer of gel base coat to each nail, ensuring you cover the entire nail surface. Avoid getting the base coat on your skin or cuticles to prevent lifting. Cure the base coat under an LED lamp for the recommended time (usually 30-60 seconds).
- Color Gel Application:
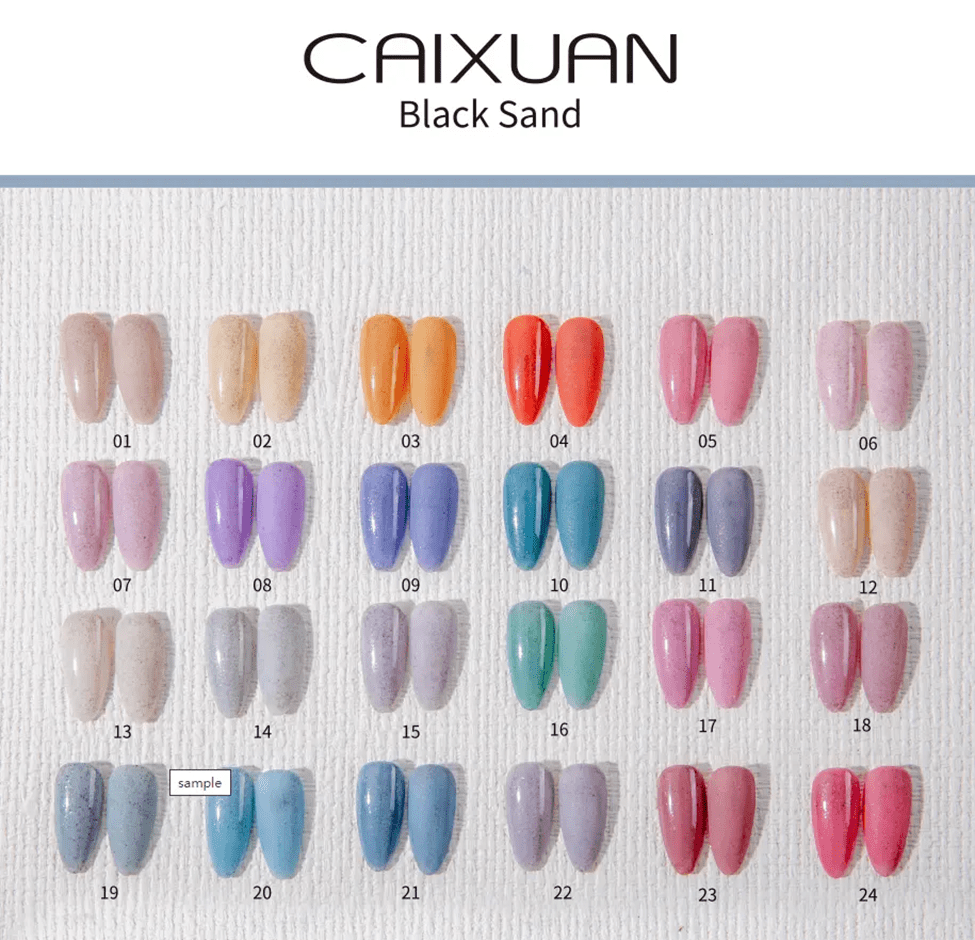
Apply a thin layer of LED color gel nail polish to your nails. Thin layers prevent wrinkling and ensure even curing. Cure the gel polish under the LED lamp for the recommended time (typically 30-60 seconds). Apply a second thin layer of color gel polish for full opacity, and cure again under the LED lamp.
- Special Effects (Optional):
If you’re using special effect gels like glitter, holographic, or cat eye, apply and cure these according to the specific product instructions.
- Top Coat:
Apply a thin layer of gel top coat to seal and protect the color. Cure the top coat under the LED lamp for the recommended time (usually 60-90 seconds). Ensure you cap the free edge of your nails with the top coat to prevent chipping.
Finishing
- Cleanse Nails:
After curing the top coat, there might be a sticky residue on your nails. Remove this with a lint-free wipe soaked in nail cleanser or alcohol.
- Hydrate Cuticles:
Apply cuticle oil to your cuticles and massage it in to keep them moisturized and healthy.
Tips for Best Results
- Thin Layers: Always apply thin layers of gel polish to ensure even curing and prevent lifting.
- Curing Time: Follow the manufacturer’s instructions for curing times to avoid under or over-curing the gel.
- Avoid Skin Contact: Keep the gel polish off your skin and cuticles to prevent lifting and peeling.
- Proper Storage: Store your gel polishes in a cool, dark place to prolong their shelf life and maintain their consistency.
Maintenance and Care
- Regular Touch-Ups: Touch up any chips or peeling spots as soon as they appear to maintain the integrity of your manicure.
- Hydrate Regularly: Keep your cuticles and nails hydrated with cuticle oil and hand cream to prevent dryness and peeling.

- Proper Removal: Use a gentle removal method to avoid damaging your nails. Soak a cotton ball in acetone, place it on your nail, wrap it in foil, and wait 10-15 minutes. Gently push off the softened gel with an orangewood stick or a cuticle pusher.
By following these steps and tips, you can achieve a salon-quality LED gel manicure at home that lasts for weeks.
Conclusion:
LED color gel nail polish offers a durable, vibrant, and stylish alternative to traditional nail polish, making it a must-have for anyone looking to achieve long-lasting and professional-quality manicures. With a wide variety of colors and special effects available, there’s something to suit every preference and occasion. So, what are you waiting for? Contact Caxiun today to get a quote and elevate your nail game with the best LED color gel nail polish on the market.